Loading store
Loading store
WishlistStore FinderGift Cards

How to lay Urban Paving Concrete Pavers

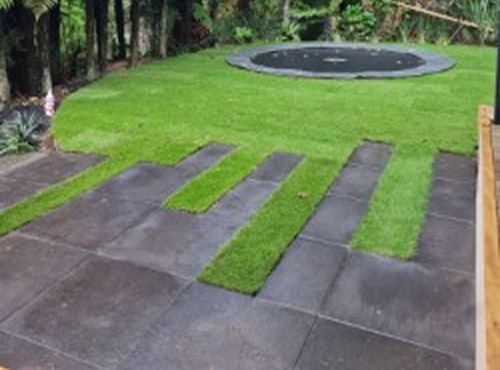
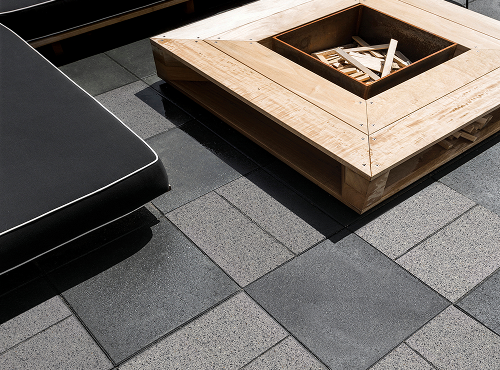
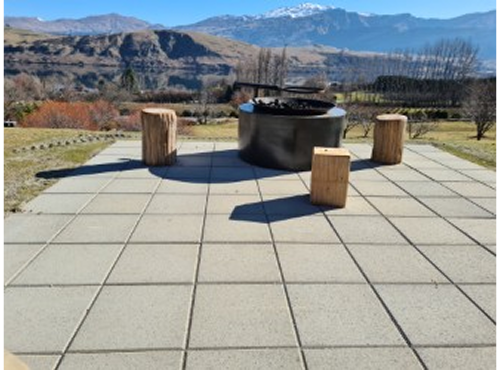
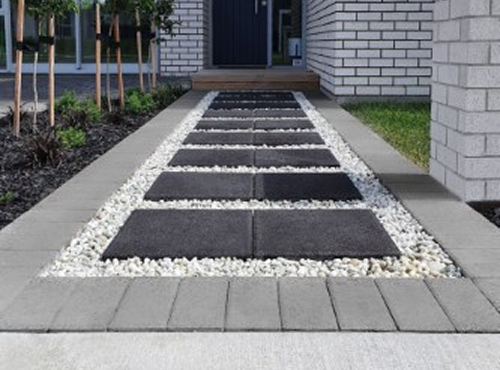
Urban Paving Concrete Pavers are strong, versatile, and made to handle New Zealand’s unique conditions. With a wide range of sizes and finishes, they’re ideal for paths, patios and courtyards. This guide follows Urban Paving’s recommended installation practices, showing you exactly how to prepare, lay, seal and care for your pavers for long-lasting results.

What you’ll need

Before you begin, make sure you’ve got everything ready.

Materials:

  • Urban Paving Concrete Pavers (mix from multiple pallets for consistent colour)

  • Basecourse aggregate (AP20 or GAP20)

  • Bedding sand (clean, sharp washed sand)

  • Jointing sand (dry sand or stabilised polymeric sand)

  • Edge restraints (kerb, paver on edge, or concrete haunching)

  • Clean water

  • Sealer (optional)

Tools:

  • Tape measure and pencil

  • Pegs and string lines

  • Spirit level

  • Spade and shovel

  • Wheelbarrow and rake

  • Plate compactor

  • Rubber mallet

  • Trowel and rake

  • Screeding board (100 x 25 mm and about 2 m long)

  • Screeding rails (25–30 mm diameter)

  • Stiff broom and soft broom

  • PPE (gloves, safety glasses, hearing protection, dust mask

Before you start

Plan your fall

Plan a slope of at least 10 mm per metre (1 percent) away from buildings and structures. This ensures rainwater drains off instead of pooling on your paved surface.

Pro tip icon
Pro tip: Proper drainage protects against efflorescence and colour fading caused by moisture build-up.

Check drainage and soil conditions

If the area has poor drainage or clay soils, add a sub-base of GAP40 aggregate to improve stability and water flow. In wet or heavy soils, consider installing a subsoil drain before you begin.

Step-by-step laying instructions

  1. Site preparation and excavation
    Remove grass, roots, and topsoil from the area. Excavate enough to include the full build-up of layers: basecourse, bedding sand, and the paver thickness, for Paths and patios we recommend: 150 mm total depth Shape the ground to the planned slope for drainage. Compact the subgrade with a plate compactor.
  2. Basecourse installation
    The basecourse provides the structural support for your paved area. Use GAP20 aggregate and lay it in layers no thicker than 75 mm. Compact each layer thoroughly before adding the next. Lightly moisten the material as you compact it to help the fines settle, for Paths and patios we recommend: Paths and patios: 75–100 mm compacted basecourse. Finish the base so it is level and follows your planned slope.
  3. Bedding sand
    Spread a layer of clean, washed sand over the compacted base. Screed it smooth to a uniform thickness of 40 mm below the desired paver height.
    • Use screeding rails or straight pipes to guide the height.
    • Run your screeding board along the rails to get a flat surface.
    • Remove the rails and fill the gaps with sand.
    Avoid walking on the sand after screeding. Only prepare small sections at a time that you can cover with pavers the same day.
  4. Laying the pavers
    Start laying from a straight edge or a fixed point such as a wall or path edge.
    • Lay pavers in your chosen pattern.
    • Keep the joint spacing even, following the built-in spacer lugs where present.
    • Tap each paver gently into place using a rubber mallet.
    • Check levels with a spirit level and ensure the surface follows your planned slope.
  5. Pro tip icon
    Pro tip: On large areas, pull string lines across both directions to keep rows square and alignment true.
  6. Cutting pavers
    Cut the last row of pavers to fit using a block splitter or diamond wet saw. Always wear protective equipment when cutting. Cut pavers slightly smaller if needed for a clean fit rather than forcing them into place.
  7. Edge restraints
    Install edge restraints around the perimeter to hold the pavers firmly in position. Use concrete kerbs, timber edging, or pavers set on edge. If you use concrete haunching, extend the basecourse by about 150 mm under the haunch. The haunch should reach at least halfway up the side of the edge pavers. Allow it to cure for at least 24 hours before compacting nearby.
  8. Compacting the surface
    After laying, run the plate compactor over the surface with a rubber mat attached to avoid chipping or marking the pavers. Make two to three passes in different directions to seat the pavers properly into the bedding sand. If you are using large format pavers or thinner slabs, skip compaction and simply settle the pavers gently with a rubber mallet to prevent cracking.
  9. Jointing
    Once compacted, fill all joints with dry jointing sand. Sweep the sand over the surface and work it into the gaps.
    • Use fine, dry sand for narrow joints or polymeric stabilised sand for better resistance to washout.
    • Compact again after filling to ensure joints are completely packed.
    • Repeat the process until joints remain full after compaction.
    • Sweep off any remaining sand.
Pro tip icon
Pro tip: If using polymeric sand, lightly mist the surface to activate it after jointing, following the product’s instructions.

Sealing your pavers

Sealing helps protect your paving from stains, fading, and moisture while making cleaning easier.

When to seal:
Wait at least two to three weeks after installation to allow any moisture to escape from the bedding sand and basecourse.

How to apply

  1. Clean the surface thoroughly to remove dust and loose sand.
  2. Apply a water-based acrylic or penetrating sealer evenly using a roller or sprayer.
  3. Allow the first coat to dry completely before applying a second light coat.
  4. Avoid walking or driving on the area for at least 24 hours.
Reapply sealer every two to three years, or as needed depending on exposure and traffic.

Pro tip icon
Pro tip: Always test the sealer on a small hidden section first to confirm the desired finish.

Maintenance and care

Regular cleaning

  • Sweep regularly to remove dirt, dust, and leaves.
  • Wash occasionally with mild detergent and water.
  • Avoid using harsh acids or bleach that can damage the paver surface.

Weed control
Fill joints properly and maintain them to reduce weed growth. If weeds appear, remove them before they establish roots.

Efflorescence
White powdery deposits may appear on new pavers as moisture brings salts to the surface. This is normal and will naturally fade over time. To remove, use an efflorescence cleaner or diluted vinegar and rinse thoroughly.

Repairs and replacements
If a paver cracks or stains, lift it out carefully and replace it with a new one. Keep spare pavers from your original batch for colour matching.

Resealing
Inspect sealed areas annually. If water no longer beads on the surface, it’s time to reapply sealer.


Pro tip icon
Pro tip: Efflorescence (a white chalky deposit) can occur naturally as concrete cures. It usually fades with weathering and washing but can be treated with an efflorescence remover if needed.

Note: Product instructions shown here are provided for guidance only and may not reflect current advice. Please refer to the manufacturer’s documentation for most up to date instructions.

Download the supplier’s full guide

For complete technical details, you can view or download the official installation PDF.

Download full PDF guide

Feinwerk concrete pavers

Feinwerk

Concrete Pavers

Firth Concrete Pavers

Firth

Concrete Pavers

Viblock Concrete Pavers

Viblock

Concrete Pavers

Premier Italia Concrete Pavers

Premier

Italia Concrete Pavers

Premier Lifestyle Concrete Pavers

Premier

Lifestyle Concrete Pavers

Urban Paving Concrete Pavers

Urban Paving

Concrete Pavers

Urban Paving Natural Pavers

Urban Paving

Natural Pavers

Urban Paving Porcelain Pavers

Urban Paving

Porcelain Pavers

Urban Paving Natural Cobblestones

Urban Paving

Natural Cobblestones