Loading store
Loading store
WishlistStore FinderGift Cards

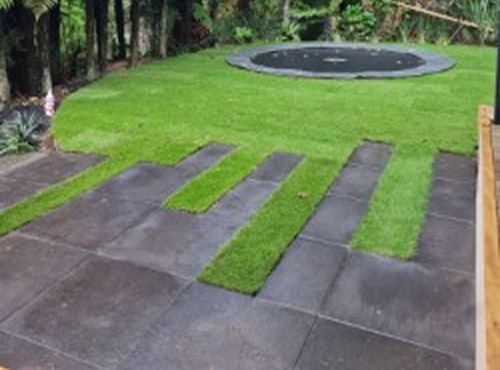
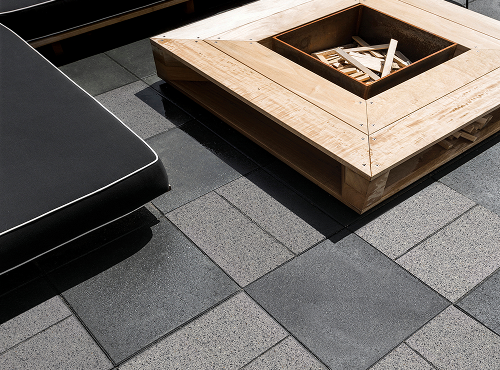
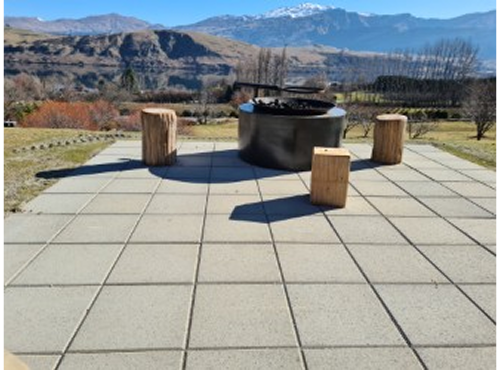
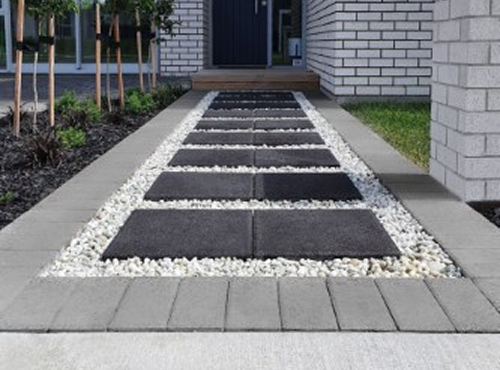
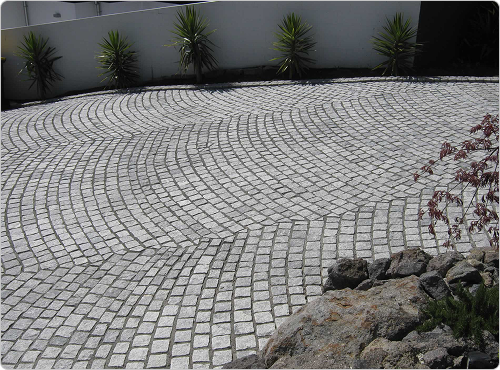
How to lay Premier Lifestyle Concrete Pavers

Premier Lifestyle Concrete Pavers are a versatile and stylish option for patios, courtyards, and pathways. Designed to deliver long-lasting performance and an easy-care finish, these pavers combine strength, modern style, and practical installation. This step-by-step guide shows you how to prepare your base, lay your pavers, grout the joints, seal the surface, and keep your paving looking great for years to come.

What you’ll need

Before you begin, make sure you’ve got everything ready.

Materials:

  • Premier Lifestyle Concrete Pavers (mix from several packs for consistent colour)

  • Premier Base Course (bagged aggregate)

  • Premier Washed Sand (for bedding)

  • Premier Sweep-in Grout or fine dry sand (for joints)

  • Cement and builders mix (for mortar base, if required)

  • Edge restraints (kerb, concrete haunching, or pavers on edge)

  • Clean water

  • Sealer (optional)

Tools:

  • Tape measure and pencil

  • Pegs and string lines

  • Spirit level

  • Spade and shovel

  • Wheelbarrow and rake

  • Plate compactor

  • Rubber mallet

  • Screed board or straight edge

  • Masonry saw or bolster and hammer for cuts

  • Stiff broom and soft broom

  • PPE (gloves, safety glasses, hearing protection, dust mask

Before you start

Plan your space

Mark out your area using stakes and string lines, ensuring the space is square and measurements are correct. Consider your preferred pattern and where cuts will fall. This saves time later and helps reduce waste.

Set the fall

Your paved surface must drain properly. Aim for a slope of 10–15 mm per metre away from your house or other structures.

Prepare your ground

Ensure the ground is firm and compacted. Remove any soft soil, roots, or organic matter. For driveways or heavier use, dig deeper and use a thicker base layer.

Pro tip icon
Pro tip: Good preparation is key to a lasting job. A well-compacted base will help prevent cracking and uneven settling later.

Step-by-step laying instructions

  1. Excavation and sub-base
    For paths and patios, excavate to allow for pavers plus around 50 mm of compacted basecourse.
For driveways or heavy loads, excavate 150–200 mm and install a sub-base using GAP20 or similar aggregate. Shape the base to follow your planned fall and compact it firmly with a plate compactor.
  2. Install edge restraints
    Secure the perimeter using kerb blocks, concrete haunching, or pavers on edge.
If using haunching, extend the basecourse slightly beyond the paved area and allow the haunching to cure before compacting near it.
  3. Lay the basecourse
    Spread Premier Base Course evenly to about 65 mm thick, then compact it using a plate compactor.
After compacting, spread Premier Washed Sand on top and screed it to an even layer approximately 5–10 mm thick. When compacted, your sand bed should be 50 mm thick and level. One tonne of Premier Base Course covers around 8 m².
  4. Laying your pavers
    Start from a straight edge or corner and follow your chosen pattern.
Lay each paver gently into place and tap down with a rubber mallet until level. Keep your joints straight and consistent throughout. Use the built-in spacers if your pavers have them, or maintain a 2–4 mm gap manually.
  5. Cutting
    Cut pavers where needed using a masonry saw or bolster and hammer.
Always wear eye and hearing protection while cutting. Avoid placing cut pavers in the centre of high-traffic areas. Keep them along edges where possible for a cleaner, more professional appearance.
  6. Filling the joints
    Once the pavers are laid and fully settled, make sure the surface and joints are completely dry before grouting. You can then fill all joints with Premier Sweep-in Grout or fine dry sand and spread the jointing material evenly using a broom.
    1. Fill all joints using Premier Sweep in Grout or fine dry sand. Spread the jointing material evenly across the surface with a broom, working it diagonally so it is pushed right down into the joints.
    2. Gently compact the pavers using a plate compactor fitted with a rubber mat. This helps the grout settle properly.
    3. Refill the joints as needed and repeat the process until they remain full after compaction.
    4. Sweep off any remaining material.
    If you are using Premier Sweep in Grout, lightly mist the joints with clean water to activate the binding agents. The surface should be damp, not wet. Avoid over watering as too much water can wash out the grout or stain the pavers. Allow the grout to set according to the manufacturer’s instructions before using the area.
  7. Sealing your pavers
    Sealing your pavers will help protect against stains, fading, and weathering. When to seal:
 Wait at least two to three weeks after installation to allow any trapped moisture to escape before applying sealer. How to apply: Ensure the surface is clean and completely dry.
    1. Apply Premier Sealer evenly with a roller or sprayer.
    2. Let the first coat dry fully before applying a second light coat.
    3. Keep off the surface for 24 hours while it cures.
    Reapply every two to three years or as needed depending on exposure and traffic.
  8. Final inspection
    Once complete, check that:
    • Joints are full and even.
    • The fall allows for good drainage.
    • The surface is stable and free from rocking pavers.
    • Edges are secure and tidy.
    Sweep off any loose sand and wash down the area to reveal your finished surface.

Sealing your pavers

Sealing protects your Premier Lifestyle Pavers from staining, fading, and moisture while enhancing their colour.

When to seal:
Wait two to three weeks after installation to allow moisture in the bedding and joints to evaporate fully.

Surface preparation:

  1. Make sure pavers are completely clean and dry.
  2. If there is efflorescence (white residue), clean with a mild detergent or efflorescence remover.
  3. Avoid sealing in damp or hot conditions.

Application:

  1. Use a penetrating, water-based sealer for natural protection or a solvent-based sealer for a richer finish.
  2. Apply with a roller or low-pressure sprayer in thin, even coats.
  3. Allow the first coat to dry completely before applying a second coat.
  4. Keep traffic off the surface for at least 24 hours.

Maintenance: Reseal every three to five years depending on weather and foot traffic. Clean regularly using mild detergent and water.

Pro tip icon
Pro tip: Always test a small area first to check the final finish before sealing the full surface.

Maintenance and care

  • Sweep regularly to remove dirt and debris.
  • Wash occasionally with mild detergent and water.
  • Avoid strong acid or bleach cleaners.
  • Top up jointing sand or grout if it settles over time.
  • Reseal every few years for continued protection.
Pro tip icon
Pro tip: Efflorescence (a white chalky deposit) can occur naturally as concrete cures. It usually fades with weathering and washing but can be treated with an efflorescence remover if needed.

Note: Product instructions shown here are provided for guidance only and may not reflect current advice. Please refer to the manufacturer’s documentation for most up to date instructions.

Download the supplier’s full guide

For complete technical details, you can view or download the official installation PDF.

Download full PDF guide
Feinwerk concrete pavers

Feinwerk

Concrete Pavers

Firth Concrete Pavers

Firth

Concrete Pavers

Viblock Concrete Pavers

Viblock

Concrete Pavers

Premier Italia Concrete Pavers

Premier

Italia Concrete Pavers

Premier Lifestyle Concrete Pavers

Premier

Lifestyle Concrete Pavers

Urban Paving Concrete Pavers

Urban Paving

Concrete Pavers

Urban Paving Natural Pavers

Urban Paving

Natural Pavers

Urban Paving Porcelain Pavers

Urban Paving

Porcelain Pavers

Urban Paving Natural Cobblestones

Urban Paving

Natural Cobblestones