Loading store
Loading store
WishlistStore FinderGift Cards

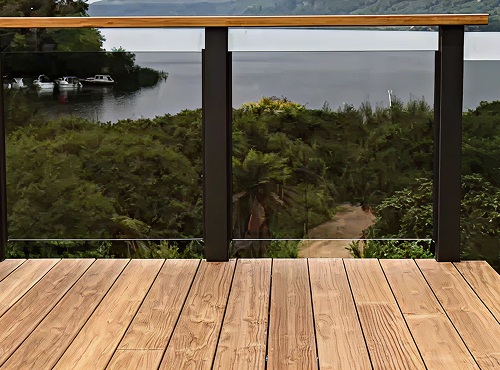
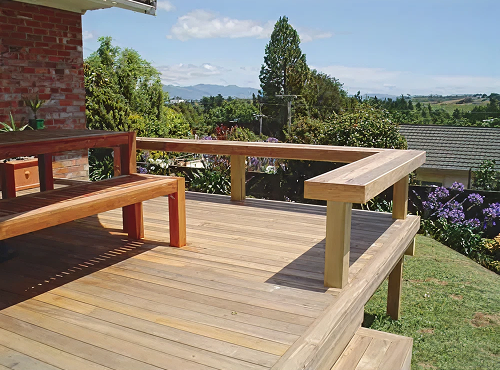
Hardwood decking installation guide

Hardwood decking such as Kwila, Garapa, and Vitex delivers a rich, natural look and long-lasting performance when installed and maintained correctly. This guide covers the key steps for preparation, installation, sealing, and maintenance so your hardwood deck performs well in New Zealand’s climate for years to come.

What you’ll need

Before you begin, make sure you’ve got everything ready.

Materials:

  • Hardwood decking boards (Kwila, Garapa, or Vitex) - 90 x 19 mm - 140 x 19 mm - 140 x 32 mm (Vitex only)

  • Stainless steel countersunk decking screws - 10G x 65 mm for 19 mm boards - 14G x 75 mm for 32 mm boards

  • High-quality wax end sealer

  • Exterior decking oil or clear penetrating finish

  • Mild detergent and low-pressure washer

Tools:

  • Tape measure and pencil

  • Spirit level and square

  • Chalk or string line

  • Drop saw with sharp timber blade

  • Power drill and driver bits

  • Countersink bit

  • Screwdriver or bit driver

  • Soft brush and cleaning gear

  • Safety gear: Gloves, Safety glasses, Hearing protection, Dust mask

Before you start

Handling and storage

  • Store decking boards flat on level bearers at least 100 mm off the ground.
  • Keep the stack dry and covered with a waterproof sheet to protect from rain and sun.
  • Maintain airflow through the stack to avoid moisture build-up.
  • Store under cover until you are ready to install.

Compliance
Decks must meet New Zealand Building Code requirements. For guidance, refer to NZS 3604 and ensure your structure is designed for durability, drainage, and safety.

Planning your deck

Joist span

  • For 19 mm decking, space joists at 450 mm centres.
  • For 32 mm decking, you can extend to 600 mm centres.

Ventilation and drainage
Adequate airflow beneath your deck is essential for stability and long-term performance.

  • Provide at least 450 mm clearance from the ground.
  • Keep the area under your deck free of obstructions and ensure drainage is effective.
  • Maintain a 12 mm gap between the deck and cladding to allow ventilation.
  • Do not fully enclose the perimeter, as this can trap moisture and cause cupping or movement.
Pro tip icon
Pro tip: In damp or shaded areas, increase clearance or use gravel to improve airflow and drainage.

Board spacing

Hardwood expands and contracts as moisture changes. Allow for these movements when laying your deck.

Board width Minimum kiln dried spacing
90 mm 4 mm
140 mm 6 mm

Boards should run perpendicular to the main direction of foot traffic to help reduce slip risk.

Step-by-step laying instructions

  1. Prepare and pre-seal boards

    • Ensure the substructure is complete, level, and made from H3 or higher treated timber.
    • Trim boards to clean ends and immediately seal all cut ends with a wax end sealer.
    • Apply a clear decking oil or stain to all four sides of each board before installation for added protection.
  2. Pro tip icon
    Pro tip: Pre-coating all sides of the boards helps minimise cupping, checking, and early discolouration.
  3. Set out and lay the first board
    • Start from the straightest edge or building line.
    • Position the first board with a 12 mm gap from cladding or walls.
    • Use a string line to keep the board straight and square to the joists.
    • Fix the first board using two stainless steel screws at every joist.

  4. Continue laying boards
    • Maintain consistent gaps using 4 mm or 6 mm spacers depending on board width.
    • Lay each new board, checking for straightness as you go.
    • Butt joins must sit directly over joists. Cut ends square and, if desired, chamfer 2–3 mm off each edge to mask height variation.

  5. Pro tip icon
    Pro tip: Stagger butt joins across joists to create a natural, random pattern.
  6. Fastening
    • Pre-drill two pilot holes per joist, positioned 15 mm from each board edge.
    • Use 10G x 65 mm stainless steel screws for 19 mm boards or 14G x 75 mm screws for 32 mm boards.
    • Drive screws flush with the surface, not below it.
    • Avoid overdriving as this can cause moisture pockets and timber splitting.
  7. Pro tip icon
    Pro tip: For best results, use stainless steel fixings (T316 grade) in coastal or damp environments to prevent corrosion.
  8. Trimming and finishing

    Once all boards are installed:

    • Snap a chalk line to mark the final edge.
    • Cut the boards to a clean, straight line.
    • Reseal all new cut ends immediately.
    • Sweep the deck and clean away sawdust or debris before coating.

Sealing and coating

Sealing

End checking and splitting can occur when boards are cut to length. Always reseal any freshly cut ends immediately with a high-quality wax sealer before final installation.

Coating

Apply decking oil to all sides of the boards prior to laying. This minimises surface checking, cupping, and discolouration.

  • Boards should be clean and free of dust or marks before coating.
  • Use a clear or lightly pigmented decking oil to highlight the natural grain.
  • Note that clear coatings will not prevent greying from UV exposure.
Pro tip icon
Pro tip: Always coat the underside of boards before installation for extra moisture control, especially on decks with limited airflow.

Maintenance and care

Regular cleaning

  • Clean your deck annually with a soft brush and mild detergent.
  • Rinse thoroughly with low-pressure water.
  • Avoid using high-pressure cleaning close to the timber surface.
  • Keep gaps clear of leaves and debris to maintain airflow and prevent mould.

Surface protection

  • Place pots or outdoor furniture on feet to allow air circulation and prevent trapped moisture.
  • Reapply decking oil every two years, or sooner if surface appears dry.
  • If coating breaks down, sand lightly to bare timber, clean thoroughly, and apply two coats of the same product.

Repairs

  • Replace damaged or warped boards promptly.
  • Seal new cut ends and recoat adjacent surfaces to maintain even weathering.


Pro tip icon
Pro tip: Consistent cleaning and recoating help extend the life and appearance of your hardwood deck for decades.

Tip: Product instructions shown here are provided for guidance only and may not reflect current advice. Please refer to the manufacturer’s documentation for most up to date instructions.

Download the supplier’s full guide

For complete technical details, you can view or download the official installation PDF.

Download full PDF guide

ABODO Vulcan Decking

ABODO

Vulcan Decking

Download PDF guide
Kwila, Garapa and Vitex hardwood decking

Kwila, Garapa and Vitex

Hardwood decking

Download PDF guide