Loading store
Loading store
WishlistStore FinderGift Cards

Everything you need to know about storage sheds

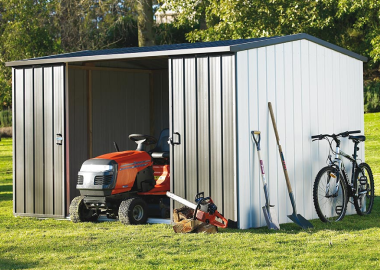
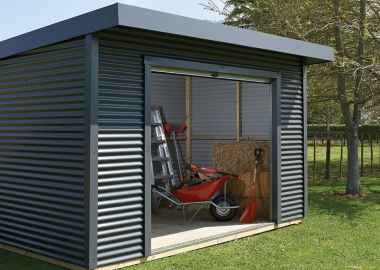
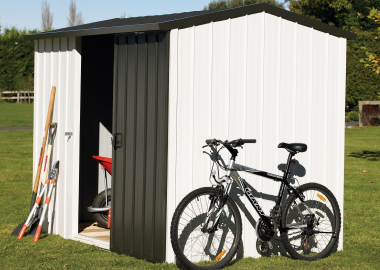
Whether you are looking at a basic metal kit shed or a larger timber structure, choosing the right shed and assembling it correctly makes the difference between a storage solution that lasts and one that causes problems within a few seasons. This guide covers what to look for when buying a storage shed, whether cheap sheds are worth buying, how to assemble a shed kit, and where to buy a storage shed in New Zealand.
Key takeaways

  • Steel sheds suit most NZ backyards and require minimal maintenance. Timber suits garden settings but needs regular painting or staining to stay weatherproof.
  • The main trade-off with lower-priced sheds is the gauge of steel used in panels and frame. Thinner steel dents more easily and is more susceptible to rust if the coating is compromised.
  • A solid, level base is essential regardless of shed price, and protects the floor and frame from water damage.
  • Assembly time for a standard steel shed kit is typically four to eight hours for two people working together.

What to consider before buying a storage shed

  1. Measure your available space and allow clearance on all sides before choosing a size
  2. Steel sheds suit most New Zealand backyards and require minimal maintenance
  3. Timber sheds suit garden settings but need regular painting or staining to stay weatherproof
  4. Plastic sheds suit coastal properties where salt air is a concern
  5. Check the shed includes a floor or confirm whether a concrete or timber base is required
  6. Confirm the shed meets any local council rules for outbuildings before purchasing

Budget friendly storage sheds

  • Budget sheds suit light-duty storage including garden tools, outdoor cushions, and seasonal items.
  • Mid-range and premium sheds suit heavier use, workshop storage, and exposed coastal sites.
  • A heavier steel gauge and quality surface finish extend shed life significantly in New Zealand conditions.
  • A solid, level base is essential regardless of shed price and protects the floor and frame from water damage.
  • Check what is included in the price, as some budget sheds exclude a floor, shelving, and anchor kits.

The main trade-off with lower-priced sheds is the gauge of the steel used in the panels and frame. Thinner steel dents more easily, flexes in high winds, and is more susceptible to rust if the coating is scratched or compromised.

In New Zealand conditions, where summer UV exposure is strong and coastal areas experience salt air year-round, a shed with a heavier steel gauge and a quality powder-coated or Zincalume finish will outlast a budget equivalent by several years.

A budget-friendly shed purchased for light-duty storage use and assembled correctly on a solid, level base will perform well.

What to consider before buying a storage shed

How to assemble a shed kit

Most shed kits sold in New Zealand are designed for homeowner assembly and come with all the components and fixings required. Assembly time for a standard steel shed kit in the 1.5 to 2.5 metre range is typically four to eight hours for two people working together. Having a second person is important for holding panels in place during the framing and wall installation stages.

  1. Read the full instruction manual before starting and check all parts against the parts list
  2. Prepare a solid, level base before beginning shed assembly
  3. Work with a second person, particularly during wall panel and roof installation
  4. Organise screws, bolts, and fixings by type before starting to avoid confusion
  5. Start with the floor frame and work up through the wall panels to the roof in the sequence the instructions specify
  6. Do not fully tighten fixings until the full structure is aligned and square
  7. Anchor the shed to its base using the anchor kit included or purchased separately

How to assemble a storage shed step by step

While specific assembly steps vary between shed models and manufacturers, the general sequence for a standard steel storage shed kit follows the same order. Following this sequence prevents the need to disassemble sections because a later step cannot be completed with an earlier one already locked in place.

  1. Step one: assemble and level the floor frame and secure to the base
  2. Step two: erect corner posts and connect wall framing rails
  3. Step three: fit wall panels from one corner around the perimeter
  4. Step four: fit the door frame and hang the doors
  5. Step five: lift and fix roof panels from eaves to ridge, overlapping as specified
  6. Step six: fit the ridge cap and anchor the completed structure to the base
  7. Step seven: touch up any cut edges or exposed fixing points with appropriate sealant or paint
How to assemble a storage shed step by step

Frequently asked questions

Do I need council consent to build a storage shed in New Zealand?

In most cases, small storage sheds in New Zealand do not require a building consent, provided they meet the exempt building work criteria under the Building Act 2004. Generally, a single-storey detached shed with a floor area under 10 square metres that is not used for habitation is exempt. Rules vary by council and property type, so check with your local council before purchasing and installing a shed to confirm the requirements for your site.

What base do I need for a storage shed?

A concrete slab is the most durable base for a storage shed and provides a stable, level surface that protects the shed floor from ground moisture. A compacted gravel pad or a timber bearer frame on concrete footings are practical alternatives where a full concrete pour is not feasible. The base must be level across its full dimensions before the shed frame is assembled. An uneven base causes the shed structure to rack and the doors to sit out of alignment.

What tools do I need to assemble a storage shed?

Most steel shed kits require a power drill or screwdriver, a rubber mallet, a spirit level, a tape measure, and a spanner or socket set for tightening bolts. Some kits include a basic assembly tool. Check the tools required section of the instruction manual before starting so everything is on hand before assembly begins. Working on a concrete or solid surface rather than on grass makes the process significantly easier and keeps components cleaner during assembly.

Storage shed base requirements and frequently asked questions

Browse storage sheds at Mitre 10

Mitre 10 stocks a full range of storage shed kits in steel and timber across standard sizes, available in-store and online across New Zealand.